
Picture a heavy-bottomed cast iron skillet screaming with heat as a marbled ribeye hits the surface. That immediate, rhythmic sizzle is not just a sound; it is the kinetic energy of moisture evaporating to make way for a crust. If you are hunting for the ultimate angus beef recipes, you have stepped into the right kitchen. We are not just searing meat; we are manipulating proteins and lipids to create a sensory masterpiece. Angus beef is prized for its superior intramuscular marbling. When those fat deposits melt, they self-baste the muscle fibers from the inside out. This results in a texture so buttery it practically dissolves on the tongue. Today, we are moving beyond basic grilling. We are diving into the molecular mechanics of heat, salt, and time. Whether you are prepping a piquant chimichurri flank or a butter-basted filet, the goal is total control over the Maillard reaction. Grab your digital thermometer and your favorite apron. We are about to transform raw, ruby-red cuts into gold-standard dinners that will make your kitchen feel like a high-end steakhouse.
The Gathers:
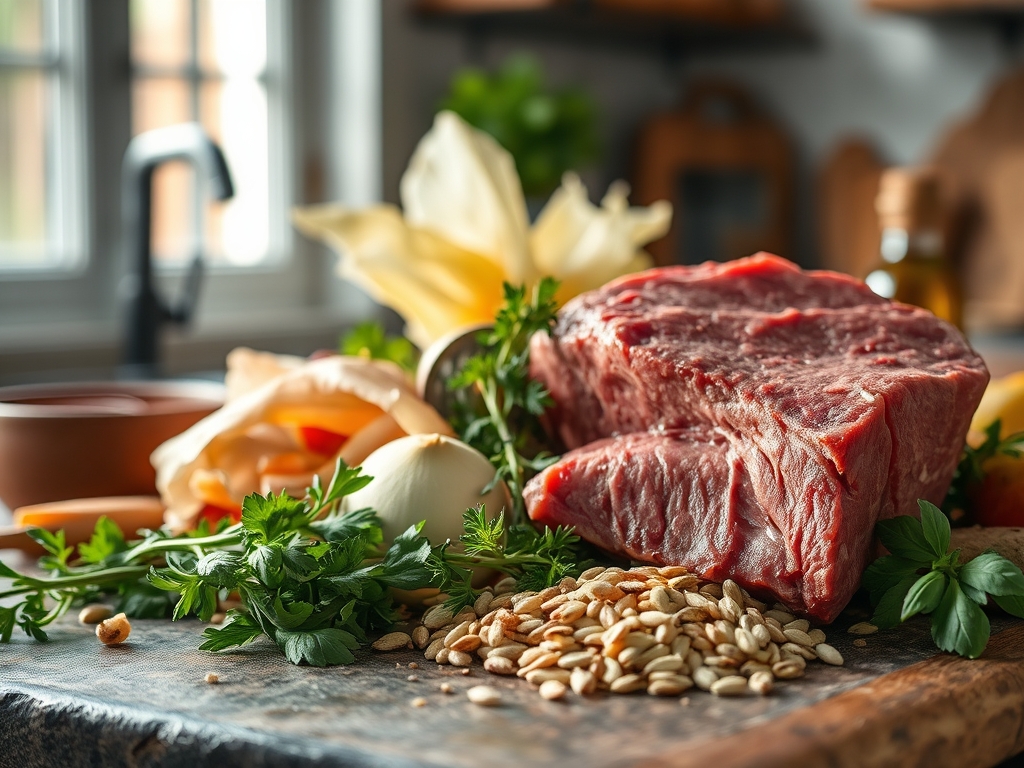
To master these angus beef recipes, your mise-en-place must be precise. Start with the beef itself. Look for "Certified Angus Beef" labels to ensure you are getting the specific genetic marbling that defines this breed. You will need high-smoke-point fats like avocado oil or clarified butter (ghee). Standard butter contains milk solids that burn at 350 degrees Fahrenheit, which is far too low for a proper sear. For aromatics, gather fresh thyme, rosemary, and smashed garlic cloves to infuse the fat during the basting phase.
Your seasoning arsenal should include coarse kosher salt; the large grains allow for better distribution and help create a dry brine effect. For acidity, keep a bottle of aged balsamic or a bright red wine vinegar nearby to deglaze the pan. Smart Substitutions: If you cannot find a specific cut like a T-bone, a thick-cut Porterhouse is its larger cousin. If you are avoiding dairy, swap the finishing butter for a viscous, high-quality olive oil infused with lemon zest to provide that necessary lipid mouthfeel without the lactose. Always use a digital scale to portion your aromatics, ensuring the flavor profile remains balanced rather than overpowering.
The Clock: Timing the Perfect Sear
The "Chef's Flow" is all about managing thermal momentum. For most of these angus beef recipes, you are looking at 15 minutes of active preparation and 10 to 20 minutes of cooking, depending on the thickness of the cut. However, the most critical time block is the "tempering" phase. You must pull your beef from the refrigerator at least 45 minutes before it touches the pan. Cold beef shocks the hot metal, dropping the temperature and steaming the meat instead of searing it.
Think of your kitchen time in three acts: the Prep (tempering and seasoning), the Execution (the high-heat sear), and the Patience (the rest). A standard 1.5-inch steak requires about 4 minutes per side for medium-rare, but the clock is secondary to internal temperature. Always account for a 5 to 10 minute rest period. During this time, the internal juices, which were pushed to the center by the heat, redistribute back to the edges of the steak.
The Masterclass:
1. The Dry Brine and Temper
Pat the beef bone-dry with paper towels to remove surface moisture. Generously apply kosher salt to all sides. Let the meat sit at room temperature for 45 minutes.
Pro Tip: This process utilizes osmosis. The salt draws moisture out, dissolves into a brine, and is then reabsorbed into the muscle fibers, seasoning the meat deeply while breaking down tough proteins.
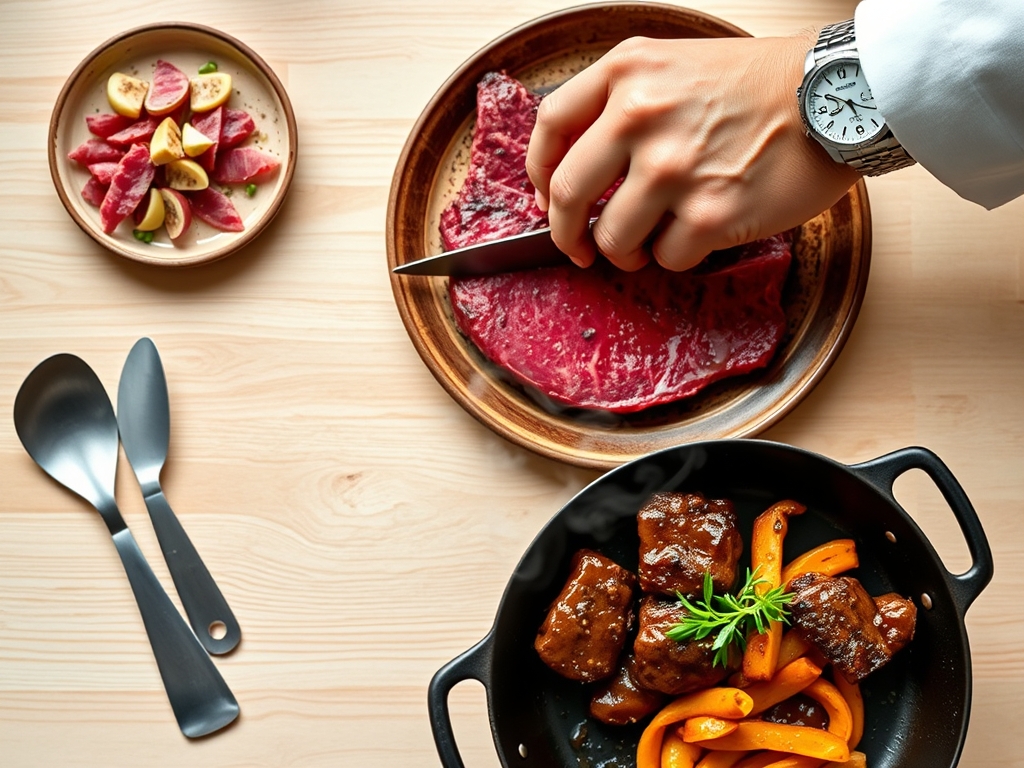
2. Achieving the Maillard Reaction
Heat a heavy-bottomed skillet until it just begins to smoke. Add two tablespoons of high-smoke-point oil. Place the beef in the pan, pressing down slightly with tongs to ensure total surface contact.
Pro Tip: The Maillard reaction occurs between 280 and 330 degrees Fahrenheit. It is a chemical reaction between amino acids and reducing sugars that creates hundreds of different flavor compounds.
3. The Arrosier Method (Butter Basting)
Once you flip the steak, add three tablespoons of butter, smashed garlic, and herbs to the pan. Tilt the skillet so the melting butter pools at the bottom, then use a large spoon to continuously pour the hot, foaming fat over the meat.
Pro Tip: This is called convection cooking within a fat medium. The hot butter reaches the nooks and crannies of the crust, adding a nutty flavor while accelerating the cooking of the top surface.
4. Monitoring Internal Temperature
Insert a digital probe thermometer into the thickest part of the steak. For medium-rare, pull the beef when it hits 130 degrees Fahrenheit.
Pro Tip: You must account for thermal carryover. The internal temperature will continue to rise by 5 to 7 degrees after you remove it from the heat source as the exterior heat moves toward the cooler center.
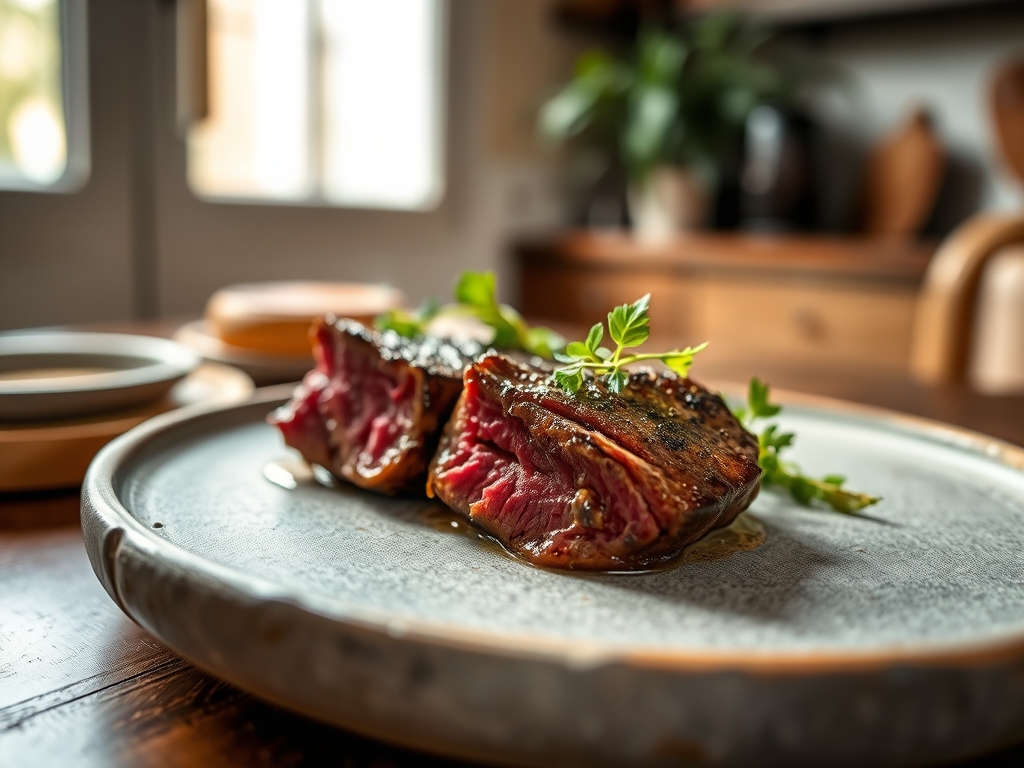
5. The Rest and Slice
Transfer the beef to a warm wooden board. Let it rest for at least 8 minutes before slicing against the grain using a sharp chef's knife.
Pro Tip: Slicing against the grain (perpendicular to the muscle fibers) shortens the fibers, making the meat significantly easier to chew and improving the overall perceived tenderness.
The Deep Dive:
When analyzing the macro nutrition of angus beef recipes, you are looking at a powerhouse of bioavailable protein, B12, and zinc. A standard 6-ounce serving provides roughly 42 grams of protein and 0 grams of carbohydrates, making it a staple for ketogenic and paleo lifestyles. For those following a Mediterranean-style diet, focus on leaner cuts like the round or sirloin and pair them with monounsaturated fats like avocado.
Dietary Swaps: To make these recipes Gluten-Free, ensure any store-bought rubs or Worcestershire sauces are certified GF. For a Vegan "steak" experience, use the same searing techniques on a thick-cut "steak" of cauliflower or lion's mane mushroom, using liquid aminos to replicate the umami depth of beef.
The Fix-It:
- Gray, rubbery exterior: This happens if the meat was wet. Use a bench scraper to clear the pan and start again with a drier surface and higher heat.
- Burned garlic: If your aromatics turn black, they become bitter. Add them only during the last 3 minutes of cooking.
- Uneven cooking: If your steak is curling, the connective tissue is shrinking. Use kitchen shears to "nick" the fat cap every inch to allow the meat to lie flat.
Meal Prep Science: To reheat steak without it turning into leather, use the "Low and Slow" method. Place it in a 250-degree oven until it reaches 110 degrees, then flash-sear it for 30 seconds in a hot pan. This prevents the proteins from over-contracting and squeezing out the remaining moisture.
The Wrap-Up:
Mastering angus beef recipes is a rite of passage for any serious home cook. It is the perfect marriage of biological science and culinary art. By understanding how heat interacts with the unique marbling of Angus cattle, you move from "making dinner" to "crafting an experience." Remember to trust your tools; use your tongs to feel the resistance of the meat and your thermometer to confirm the science. Now, go forth, get that pan screaming hot, and enjoy the most succulent steak of your life.
The Kitchen Table:
Why is Angus beef better for steaks?
Angus cattle are genetically predisposed to higher levels of intramuscular marbling. This fat melts during cooking, providing a more intense flavor and a more tender, "juicy" mouthfeel compared to other breeds with leaner muscle structures.
What is the best oil for searing beef?
Use oils with a high smoke point, such as avocado oil, grapeseed oil, or clarified butter. Avoid extra virgin olive oil or unrefined coconut oil for high-heat searing, as they will smoke and turn bitter at steak-searing temperatures.
How do I know when to flip the steak?
The steak will naturally "release" from the pan once a sufficient crust has formed. If the meat sticks when you try to lift it with tongs, the Maillard reaction is not yet complete. Wait another 30 to 60 seconds.
Should I salt my steak way in advance?
Yes. Salting at least 45 minutes prior (or up to 24 hours in the fridge) allows the salt to penetrate the fibers. If you cannot do 45 minutes, salt immediately before the meat hits the pan to prevent surface moisture.