
Imagine the sound of a heavy-bottomed skillet meeting the stovetop with a confident thud. Now, picture the sensory explosion of a dozen golden spheres sizzling in shimmering fat. We are not just talking about side dishes here; we are mastering the art of the tiny potato. These petite gems are the secret weapon of any high-end kitchen, offering a higher skin-to-flesh ratio that translates to maximum crunch and concentrated flavor. When you dive into the world of tiny potato recipes, you are playing with the physics of surface area. Because they are small, heat penetrates to the core faster, allowing the exterior to undergo the Maillard reaction while the interior remains buttery and dense. Whether you are aiming for a piquant herb infusion or a salt-crusted finish, these tubers are the ultimate canvas. Forget the mealy, oversized russets of the past. We are going for something more refined, more textured, and infinitely more satisfying. It is time to treat your kitchen like a laboratory and your dinner guests like royalty.
The Gathers:
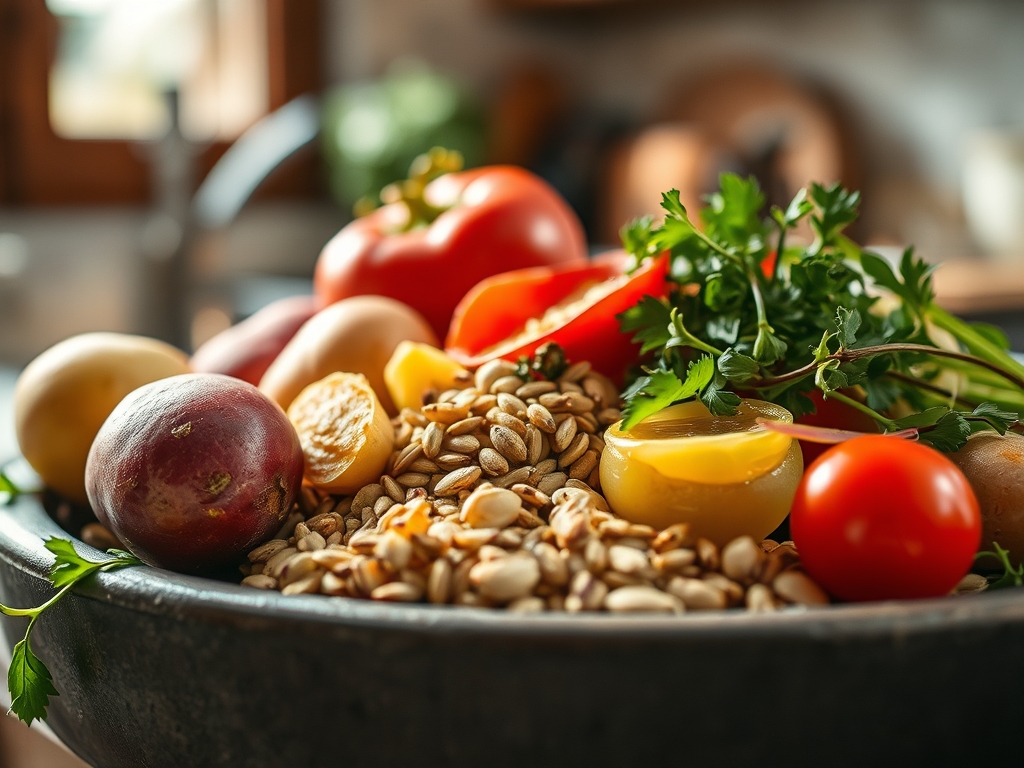
To execute the perfect tiny potato recipes, your mise-en-place must be precise. Start with two pounds of C-size potatoes, such as Dutch Yellows or Ruby Sensations. These varieties possess a high moisture content and a thin periderm, which means they do not require peeling. You will need a high-quality fat with a high smoke point; clarified butter (ghee) or duck fat are the gold standards here because they render beautifully without scorching. For the aromatic profile, gather fresh rosemary sprigs, unpeeled garlic cloves for a mellow infusion, and flaky Maldon sea salt.
Smart Substitutions: If you cannot find duck fat, a cold-pressed avocado oil provides a similar thermal stability. For a vegan twist, use a refined coconut oil to achieve that signature "snap" on the skin. If you lack fresh herbs, a teaspoon of dried herbes de Provence can be bloomed in the oil to release its volatile oils. Always use a digital scale to measure your fats; a ratio of 15 grams of fat per 500 grams of potatoes ensures even coating without creating a greasy mouthfeel.
The Clock:
Efficiency in the kitchen is about understanding "Chef's Flow." The total active time for this masterclass is approximately 15 minutes, with a total cook time of 40 minutes.
Prep (5 minutes): This involves washing and drying the tubers. Moisture is the enemy of the Maillard reaction, so use a clean kitchen towel to ensure they are bone-dry.
The Parboil (10 minutes): A quick blanch in alkaline water (add a pinch of baking soda) pre-gelatinizes the surface starches.
The Roast (25-30 minutes): This is the hands-off phase where the thermal energy does the heavy lifting.
The Rest (5 minutes): Never skip this. Resting allows the internal steam to redistribute, preventing the skins from becoming tough.
The Masterclass:
1. The Alkaline Parboil
Place your potatoes in a pot of cold, salted water with a half-teaspoon of baking soda. Bring to a boil and simmer until just barely tender.
Pro Tip: The baking soda raises the pH of the water, which breaks down the pectin in the potato skin. This creates a starchy slurry on the surface that eventually dehydrates and crisps up into a glass-like crust.
2. The Rough-Up
Drain the potatoes in a colander and let them steam dry for two minutes. Use a bench scraper or a gentle shake of the colander to scuff the edges of the potatoes until they look slightly "fuzzy."
Pro Tip: This mechanical agitation increases the surface area. More surface area means more room for the fat to cling and more sites for enzymatic browning to occur during the roasting phase.
3. The Fat Infusion
In a heavy-bottomed skillet or a saucier, warm your chosen fat with smashed garlic and rosemary. Once fragrant, toss the potatoes in this infused lipid until every millimeter is coated.
Pro Tip: This is a process of lipid-soluble flavor transfer. The essential oils in the herbs are hydrophobic, meaning they bind perfectly to the fat, which then carries that flavor deep into the potato skin.
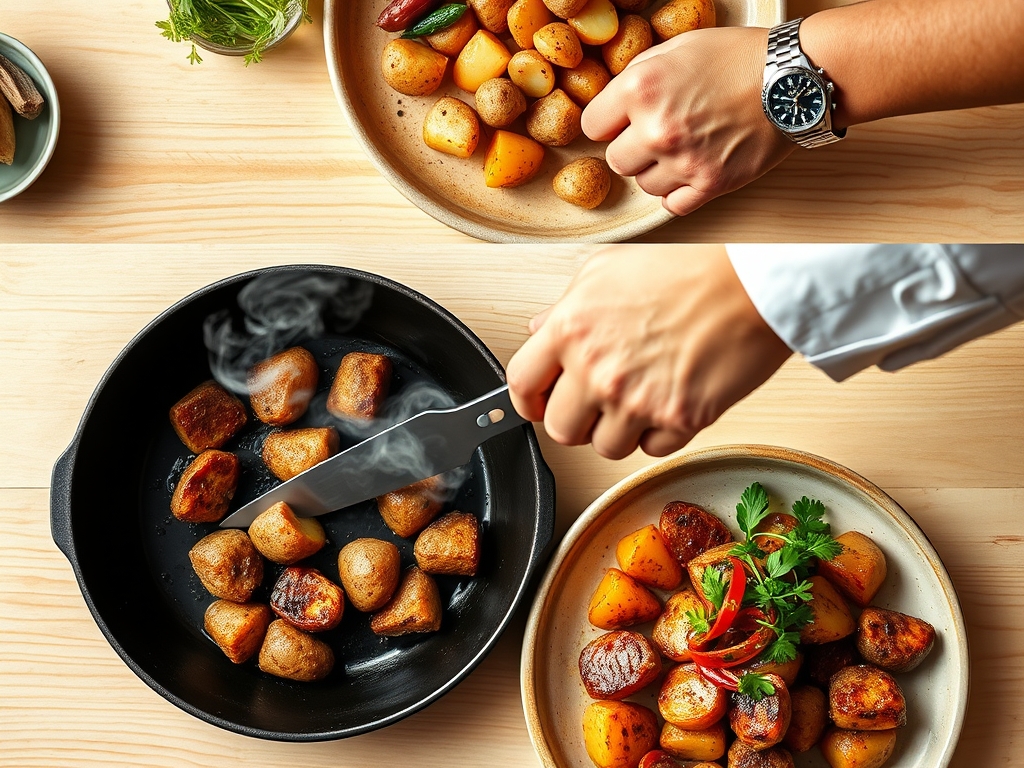
4. The High-Heat Roast
Spread the potatoes on a preheated sheet pan. Do not crowd them; air circulation is vital. Roast at 425 degrees Fahrenheit, turning once with metal tongs to ensure 360-degree browning.
Pro Tip: High heat triggers the Maillard reaction, a chemical reaction between amino acids and reducing sugars. Crowding the pan creates steam, which keeps the temperature at 212 degrees and prevents browning.
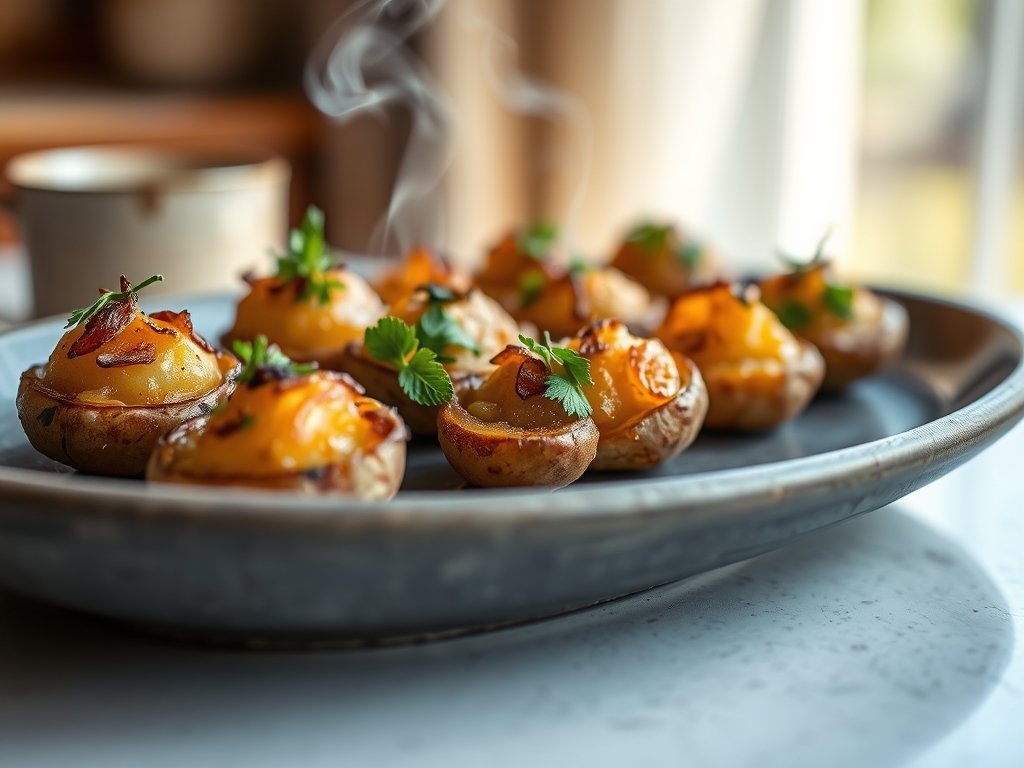
5. The Finishing Salt and Aerate
Remove from the oven and immediately toss with fresh herbs and flaky salt. Use a microplane to zest a bit of lemon over the top for a piquant lift.
Pro Tip: Adding salt at the very end prevents it from drawing out moisture during the cook process. The citrus zest provides citric acid, which cuts through the richness of the rendered fats.
The Deep Dive:
Macro Nutrition
Tiny potatoes are surprisingly nutrient-dense. A standard serving provides roughly 110 calories, 2 grams of fiber, and more potassium than a banana. Because we are using high-quality fats like ghee, you are also getting fat-soluble vitamins A and K2.
Dietary Swaps
Vegan: Swap butter for extra virgin olive oil or avocado oil.
Keto: While potatoes are higher in carbs, you can use this same technique with radishes or cauliflower florets to mimic the texture.
GF: Naturally gluten-free, just ensure your spices are not processed in a facility with wheat.
The Fix-It: 3 Common Pitfalls
1. Soggy Skins: This usually happens because the potatoes were not dried properly after parboiling. Fix it by extending the "steam dry" phase or using a hair dryer on a cool setting for 30 seconds.
2. Burnt Garlic: If your garlic turns black, it becomes bitter. Fix it by adding the garlic in the last 10 minutes of roasting rather than at the start.
3. Sticking to the Pan: This occurs when the pan wasn't preheated. Fix it by always sliding your baking sheet into the oven while it preheats so the potatoes hit a hot surface immediately.
Meal Prep: The Reheating Science
To maintain "day-one" quality, avoid the microwave, which turns the starch into a rubbery mess. Instead, reheat in an air fryer or a toaster oven at 375 degrees for 5 minutes. This re-shatters the fat molecules and restores the crispy exterior without drying out the center.
The Wrap-Up:
Mastering tiny potato recipes is about more than just a side dish; it is about understanding the chemistry of heat and texture. By manipulating the pH of your water and maximizing surface area through mechanical scuffing, you elevate a humble root vegetable into a culinary masterpiece. These tiny potatoes are the ultimate crowd-pleaser, offering a sophisticated crunch that pairs perfectly with everything from a seared ribeye to a bright spring salad. Now, grab your tongs and get to work!
The Kitchen Table:
Why are my tiny potatoes still hard after roasting?
You likely skipped the parboiling step. Parboiling ensures the interior starch is fully gelatinized before the exterior crisps. Without it, the outside burns before the inside softens. Always boil until fork-tender before hitting the oven.
Can I use waxier potatoes for this method?
Yes, Red Bliss or Fingerlings work beautifully. Their waxy texture holds its shape during the "rough-up" phase, resulting in a creamy interior that contrasts perfectly with a shattered, crispy skin. Avoid starchy Russets for this specific "tiny" technique.
How do I get the seasoning to stick better?
The secret is the starchy slurry created during the alkaline boil. That "fuzz" on the potato surface acts like a biological glue, trapping the infused fats and spices so they stay on the potato rather than the pan.
Is it necessary to preheat the baking sheet?
Absolutely. Placing cold potatoes on a cold pan leads to sticking and uneven browning. A hot pan sears the surface instantly, initiating the Maillard reaction and ensuring the potatoes release easily when it is time to flip.