
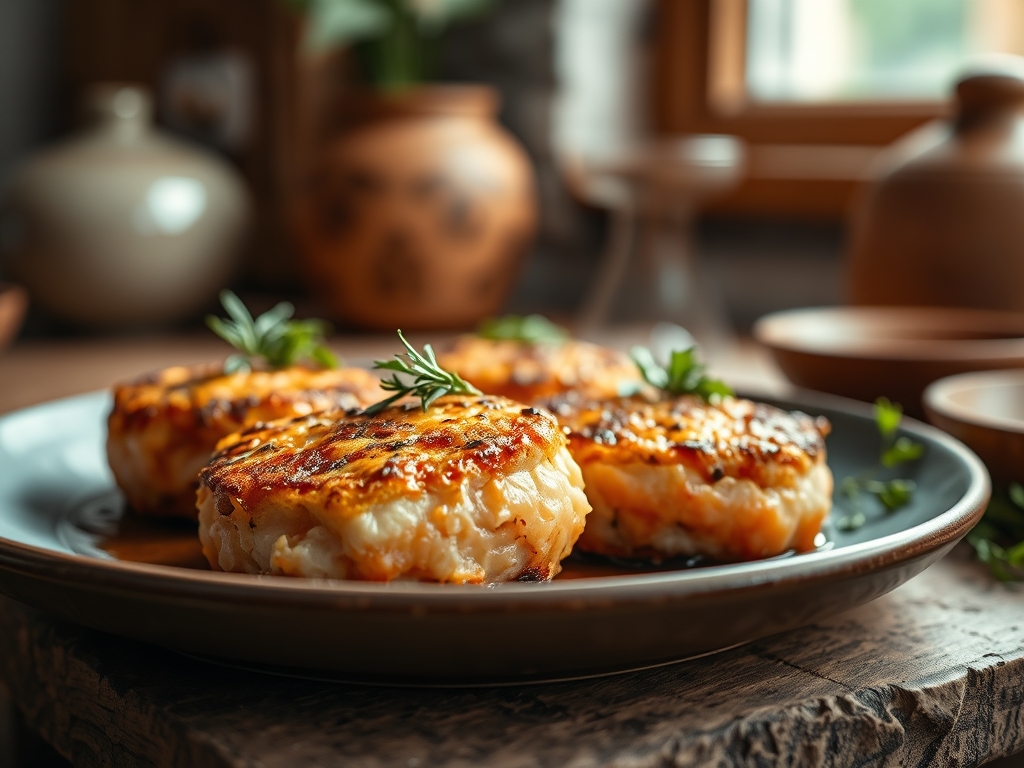
Picture the sound of a heavy-bottomed skillet meeting a cold burner; it is the quiet before the storm of a perfect dinner. You are standing in your kitchen, the scent of fresh dill and citrus zest beginning to infuse the air as you prepare to master salmon recipes fish cakes. This is not just about a meal; it is about the alchemy of transforming flaky, omega-3 rich fillets into golden, crispy discs of pure joy. We are chasing that specific sensory profile: a shattering exterior crust that gives way to a moist, piquant interior. Whether you are using leftover poached salmon or fresh-ground fillets, the goal is a structural masterpiece that refuses to crumble under the pressure of a fork.
The Gathers:
To achieve the perfect salmon recipes fish cakes, your mise-en-place must be precise. Start with one pound of high-quality salmon. If using fresh, look for vibrant flesh that springs back when touched. You will need a binder; traditionally, this is mashed Yukon Gold potatoes or panko breadcrumbs. For the aromatics, gather a bunch of scallions, fresh parsley, and a lemon for its essential oils. The secret to a cohesive cake lies in the viscous nature of a single large egg and a tablespoon of Dijon mustard, which acts as a natural emulsifier.
Smart Substitutions:
If you are avoiding nightshades, swap the potato for a dense cauliflower mash that has been squeezed of all moisture using cheesecloth. For a gluten-free approach, almond flour provides a nutty depth and excellent browning capabilities. If you find yourself without fresh herbs, use a teaspoon of dried dill, but remember that dried herbs are more concentrated; hydrate them in the lemon juice for five minutes before adding them to the mix to unlock their volatile oils.
The Clock
The "Chef's Flow" is all about overlapping tasks to maximize efficiency. Total prep time sits at twenty minutes, with a mandatory thirty-minute chill period, followed by twelve minutes of active cooking. While your potatoes boil or your salmon poaches, use your microplane to zest the lemon and finely mince your aromatics. The chilling phase is non-negotiable; it allows the starches to set and the proteins to bind, ensuring your cakes do not disintegrate when they hit the hot oil. Plan for a total of one hour from counter to table.
The Masterclass
1. Prep the Protein Base
Begin by gently flaking your cooked salmon into a large stainless steel mixing bowl. If using fresh salmon, pulse it briefly in a food processor until it reaches a coarse grind. You want distinct chunks, not a paste, to maintain a variegated texture.
Pro Tip: This stage is about avoiding protein denaturation. Over-handling the fish breaks down the delicate muscle fibers, leading to a rubbery texture. Keep the fish cold until the moment it meets the heat.
2. Integrate the Binder
Add your chilled mashed potatoes or breadcrumbs. Use a silicone spatula to fold the ingredients together. This is where you add your "glue": the egg and mustard.
Pro Tip: Starch gelatinization is your friend here. Chilled potatoes contain resistant starch, which provides a firmer internal structure than warm, soft mash. This ensures the cake holds its shape during the flip.
3. Infuse the Aromatics
Fold in your minced scallions, herbs, capers, and lemon zest. Season aggressively with kosher salt and cracked black pepper. The cold mixture will dull the perception of salt, so a little extra is necessary for a savory finish.
Pro Tip: Lemon zest contains limonene, an essential oil that is fat-soluble. By mixing the zest directly into the salmon, the fats in the fish absorb the citrus flavor more effectively than juice alone.
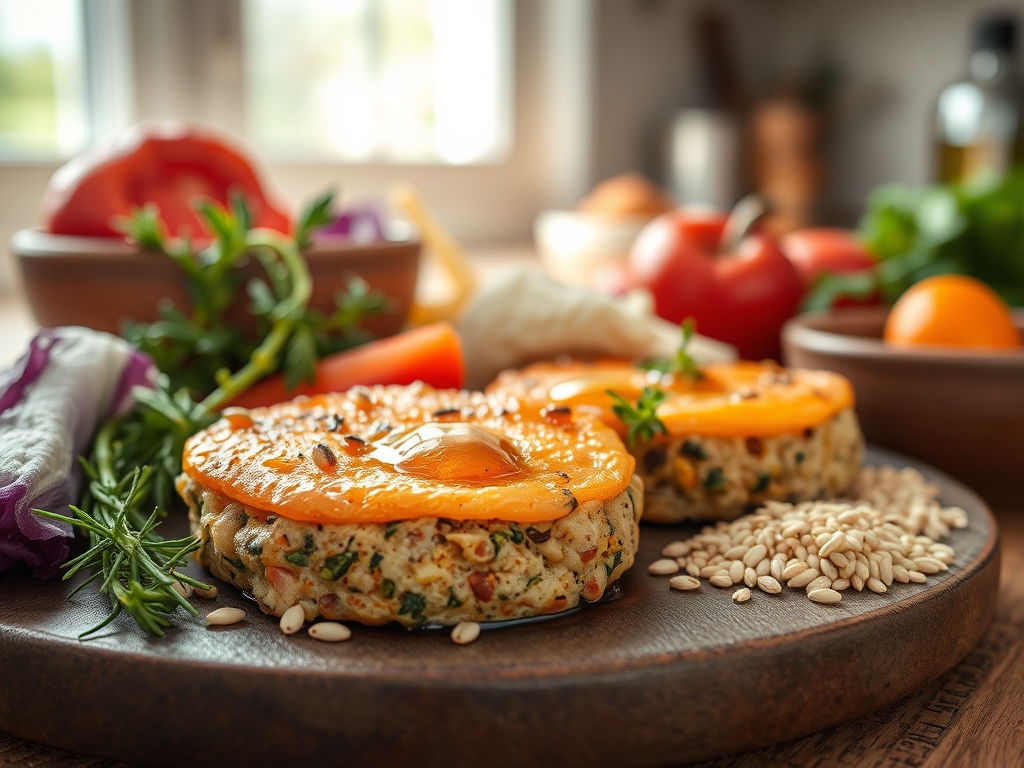
4. Shape and Aerate
Divide the mixture into eight equal portions. Use a digital scale for precision. Gently shape them into discs about one inch thick. Do not pack them too tightly; you want tiny air pockets to remain.
Pro Tip: Aeration allows steam to escape during cooking. If the cake is too dense, the internal moisture will turn the interior mushy instead of light and flaky.
5. The Mandatory Chill
Place the formed cakes on a parchment-lined baking sheet and refrigerate for at least thirty minutes. This allows the binders to fully hydrate and the fats to solidify.
Pro Tip: This is a lesson in thermal mass. A cold cake hitting a hot pan creates a rapid temperature contrast, which helps forge a crust before the interior has a chance to overcook.
6. The Searing Phase
Heat a thin layer of neutral oil in a heavy-bottomed skillet over medium-high heat. Once the oil shimmers, carefully add the cakes using a fish spatula. Do not crowd the pan.
Pro Tip: This is the Maillard reaction in action. The amino acids and reducing sugars in the salmon and binder react at high heat to create hundreds of different flavor compounds and that signature brown crust.
7. The Perfect Flip
Cook for four minutes per side until deeply golden. Use your tongs to gently stabilize the cake as you slide the spatula underneath.
Pro Tip: Watch for the "opaque line." As the heat travels upward, you will see the sides of the cake change color. Flip when the opacity reaches the halfway mark to ensure even thermal carryover.
8. Resting and Finishing
Transfer the cakes to a wire rack rather than a paper towel. This prevents the bottom from steaming and becoming soggy. Sprinkle with a touch of flaky sea salt while still hot.
Pro Tip: Resting on a rack allows for 360-degree air circulation. This preserves the structural integrity of the crust while the internal temperature stabilizes.
The Deep Dive
Macro Nutrition:
A standard serving of two salmon fish cakes provides approximately 28 grams of high-quality protein, 14 grams of healthy fats (primarily monounsaturated and Omega-3s), and 18 grams of carbohydrates. They are a nutrient-dense powerhouse, offering significant doses of Vitamin B12 and Selenium.
Dietary Swaps:
- Vegan: Use "chickpea tuna" or hearts of palm as the base, and a flax-egg (ground flaxseeds mixed with water) as the binder.
- Keto: Replace potatoes with crushed pork rinds or almond flour to keep the net carb count near zero.
- GF: Ensure your mustard and any thickening agents are certified gluten-free; use gluten-free panko for that essential crunch.
The Fix-It:
- Cakes are falling apart: Your mixture is too wet. Add a tablespoon of flour or more breadcrumbs to absorb excess moisture.
- Cakes are burning but cold inside: Your heat is too high. Lower the flame and use a lid for one minute to trap steam and warm the center.
- The flavor is bland: You likely under-salted or forgot an acid. Serve with a piquant tartar sauce or an extra squeeze of fresh lemon.
Meal Prep:
To reheat, avoid the microwave, which turns the crust into rubber. Instead, use an air fryer at 350 degrees Fahrenheit for four minutes or a dry skillet over medium heat. This restores the Maillard-induced crispness without drying out the interior.
The Wrap-Up
Mastering salmon recipes fish cakes is a gateway to culinary confidence. It teaches you the balance of textures, the importance of temperature control, and the beauty of simple ingredients handled with scientific precision. Once you have the base technique down, the variations are endless. Go forth, grab your skillet, and turn that salmon into something spectacular. Your kitchen is now a laboratory of flavor; enjoy the results!
The Kitchen Table
Can I use canned salmon for this recipe?
Yes, canned salmon is an excellent, cost-effective substitute. Ensure you drain the liquid thoroughly and remove any large bones or skin fragments before mixing to maintain a consistent, pleasant texture in your fish cakes.
Why do my fish cakes get soggy?
Sogginess usually occurs from excess moisture in the binder or overcrowding the pan. Always squeeze moisture from vegetables and ensure your oil is shimmering hot before adding the cakes to create an immediate, protective sear.
How long do salmon fish cakes last in the fridge?
Stored in an airtight container, cooked salmon cakes will remain fresh for up to three days. For the best texture, reheat them in an oven or air fryer to reactivate the crispy exterior.
Can I freeze salmon fish cakes before cooking?
Absolutely. Flash-freeze the formed, uncooked patties on a tray for one hour, then transfer to a freezer bag. They will keep for up to three months. Thaw in the refrigerator before pan-frying as directed.