
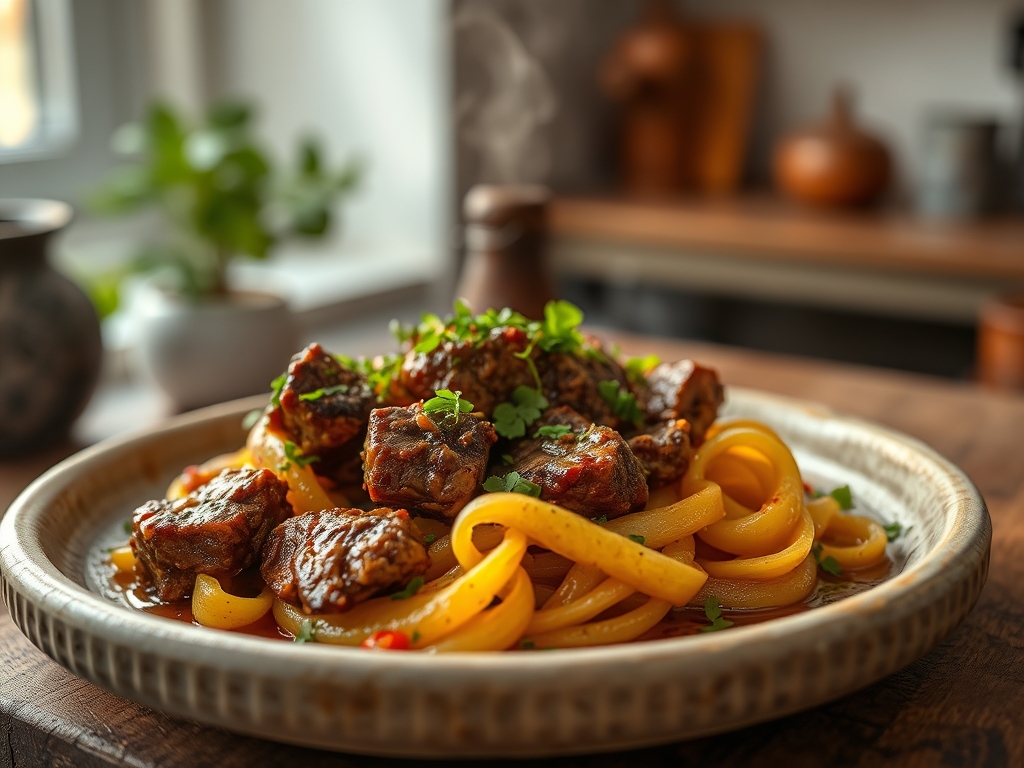
Picture the scene: a heavy-bottomed skillet resting on a blue flame, the air thick with the scent of toasted peppercorns and curry leaves snapping in hot oil. Most people do not immediately associate the subcontinent with steak, yet the landscape of beef recipes india offers some of the most complex, high-heat flavor profiles on the planet. We are moving far beyond a simple sear here; we are talking about the slow rendering of connective tissue into gelatinous gold and the aggressive Maillard reaction that occurs when meat meets a dry-rub of piquant spices. Whether it is the coconut-oil-slicked fry of the south or the robust, gravy-heavy masalas of the north, these dishes are masterclasses in spice tempering and moisture control. You are about to transform a tough cut of chuck or brisket into a tender, aromatic revelation that defies every stereotype of regional cooking. Grab your apron and your sharpest chef knife; we are diving into the science of the sear.
The Gathers:
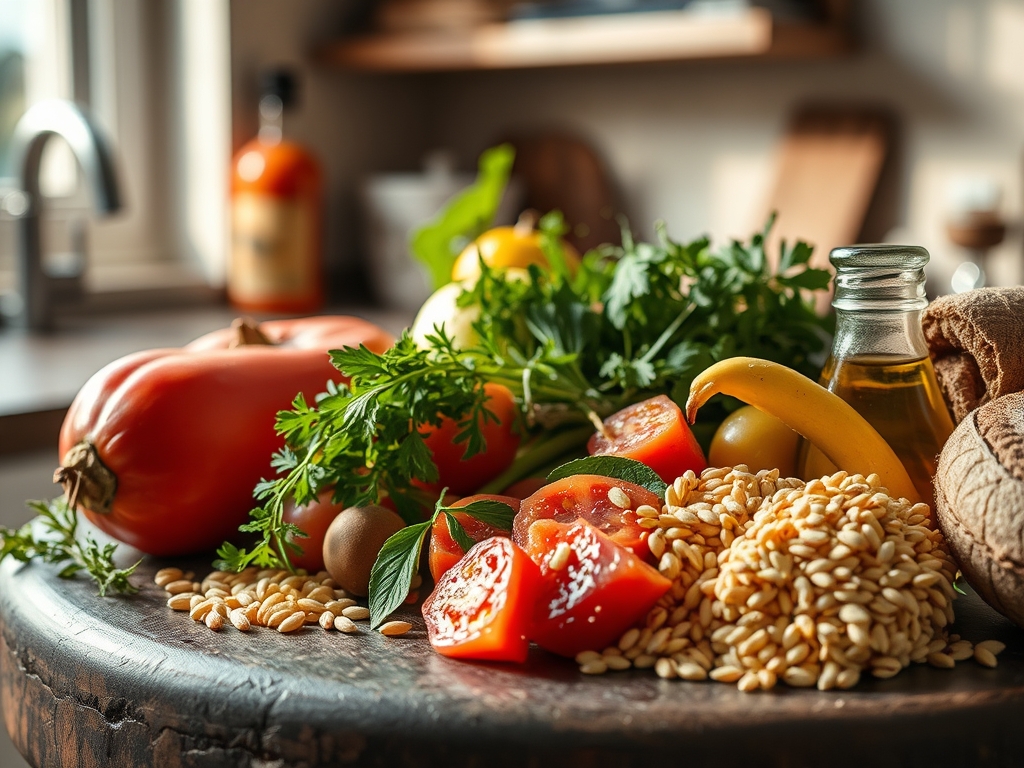
To execute these beef recipes india style, your mise-en-place must be precise. We are looking for a specific chemical harmony between fats, acids, and aromatics. Start with two pounds of high-quality beef, preferably chuck or shank, which contains the collagen necessary for a viscous sauce. You will need a digital scale to measure out 50 grams of fresh ginger and garlic; use a microplane to grate these into a fine paste to maximize surface area for flavor infusion.
The dry spice kit is non-negotiable: black peppercorns, cloves, cinnamon sticks, and star anise. These contain volatile oils that require heat to activate. For the fat, choose a high-smoke-point oil or refined ghee to ensure you can deglaze the pan without burning the milk solids. Smart Substitutions: If you cannot find fresh curry leaves, do not use dried; instead, add a zest of lime at the very end to mimic that bright, citrusy punch. If you are watching your saturated fat, replace half the ghee with avocado oil, which maintains the thermal stability needed for a hard sear.
The Clock
Efficiency in the kitchen is about the Chef's Flow. Your total active prep time is 30 minutes, while the passive cooking time ranges from 90 minutes to two hours depending on the cut. Use the first 15 minutes to cube the meat and marinate; this allows the salt to penetrate the muscle fibers via osmosis. While the meat rests, chop your aromatics. The "Flow" dictates that you clean as you go; use a bench scraper to clear your board between tasks. By the time the pot is simmering, your station should be spotless, leaving you only the final tempering of spices to manage before serving.
The Masterclass
1. The Initial Sear and Maillard Reaction
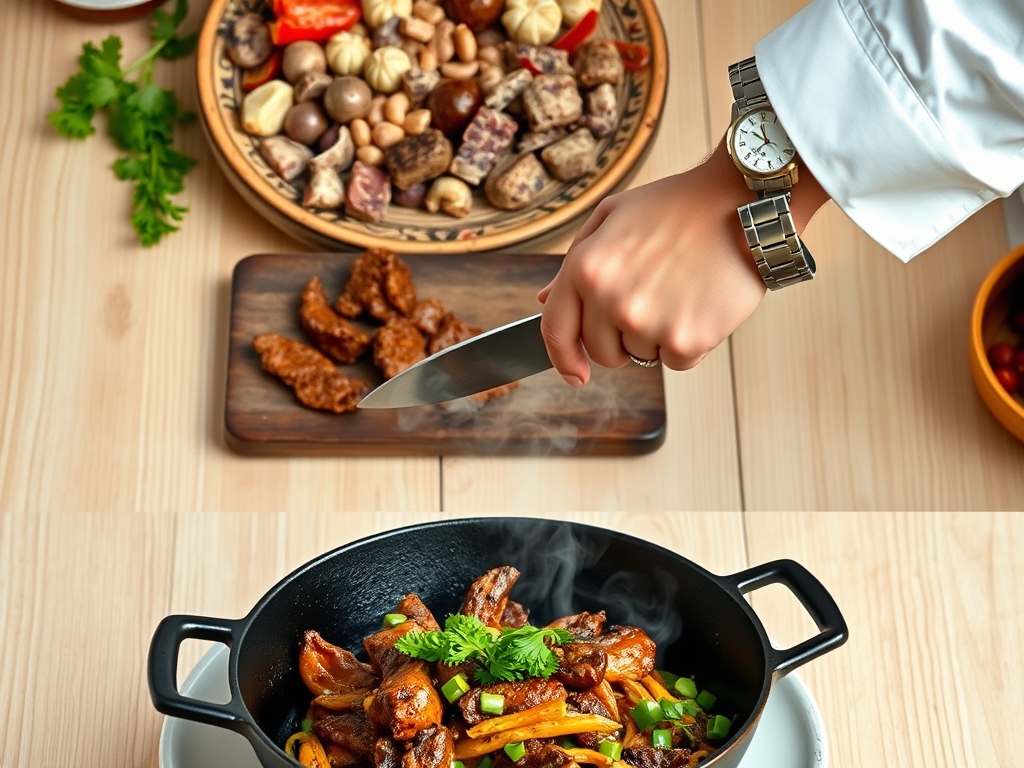
Pat the beef bone-dry with paper towels. Heat your heavy-bottomed skillet until the oil shimmers. Add the beef in batches, ensuring you do not crowd the pan, which would drop the temperature and cause the meat to steam rather than sear. Use metal tongs to turn the pieces once a deep brown crust forms.
Pro Tip: This is the Maillard reaction, a chemical reaction between amino acids and reducing sugars. Achieving this crust is vital because it creates hundreds of different flavor compounds that cannot be replicated by boiling or stewing alone.
2. Deglazing and Building the Base
Remove the meat and add your sliced onions to the rendered fat. Use a wooden spoon to scrape the fond (the brown bits) from the bottom of the pan. Once the onions are translucent, add your ginger-garlic paste and sauté until the raw aroma dissipates.
Pro Tip: Deglazing with a splash of water or stock releases the caramelized proteins back into the sauce. This creates a deeper, more savory profile known as umami, which acts as the backbone for the entire dish.
3. Toasting the Volatile Aromatics
Push the onions to the side and add your whole spices directly to the hot oil in the center of the pan. Wait for the mustard seeds to pop or the cloves to swell. This process, known as tempering or "tadka," allows the fat-soluble flavor compounds in the spices to dissolve into the cooking medium.
Pro Tip: Heating spices in oil is a form of thermal extraction. It ensures the flavors are distributed evenly throughout the fat, coating every fiber of the beef rather than sitting on top of it.
4. The Low and Slow Braise
Return the beef to the pan and add enough liquid (water, stock, or coconut milk) to partially submerge the meat. Lower the heat to a whisper, cover with a tight-fitting lid, and let the heat work its magic on the connective tissue.
Pro Tip: This is the phase of collagen conversion. At around 160 degrees Fahrenheit, tough collagen begins to melt into gelatin. This provides the silky, lip-smacking mouthfeel that characterizes a perfect Indian beef curry.
5. Reducing for Viscosity
Once the meat is fork-tender, remove the lid and increase the heat slightly. You want to reduce the liquid until it reaches a thick, viscous consistency that coats the back of a spoon. If using coconut milk, be careful not to boil it violently or the emulsion may break.
Pro Tip: Reducing the sauce concentrates the solutes. As water evaporates, the flavors of the spices and the sweetness of the onions become more intense, creating a cohesive glaze.
6. The Final Acid Hit
Just before pulling the pot off the stove, stir in a teaspoon of vinegar or a squeeze of fresh lemon juice. Use a saucier to taste and adjust the seasoning. The acid cuts through the richness of the rendered beef fat and the heavy spices.
Pro Tip: Brightness is a sensory perception. Acid triggers the salivary glands, which helps the palate navigate the heavy fats and complex spices, making the overall dish feel lighter and more balanced.
7. Resting and Carryover Cooking
Transfer the beef to a serving bowl and let it rest for five to ten minutes. This allows the muscle fibers to relax and reabsorb some of the juices that were pushed out during the high-heat reduction phase.
Pro Tip: Thermal carryover means the internal temperature will continue to rise slightly even after the heat source is removed. Resting ensures that when you finally bite into the beef, it is moist rather than stringy.
The Deep Dive
From a nutritional standpoint, these beef recipes india style are powerhouses of protein and bioavailable iron. A standard serving provides roughly 35 grams of protein and is rich in Vitamin B12. For dietary swaps, Keto followers can simply omit the onions or use them sparingly, as the fat content is already ideal. For a Vegan version, substitute the beef with "meaty" king oyster mushrooms or seitan, but reduce the cooking time significantly to avoid mushiness. If you are Gluten-Free, ensure your compounded asafoetida (hing) is not processed with wheat flour.
The Fix-It:
- Tough Meat: If the beef is still chewy, you likely haven't reached the collagen-melt point. Add a half cup of water and continue to simmer on low for another 20 minutes.
- Broken Sauce: If the oil separates too aggressively from the gravy, whisk in a tablespoon of warm water or a dollop of yogurt to re-emulsify the mixture.
- Too Salty: Drop in a peeled, halved potato for ten minutes. The starch will absorb excess sodium without altering the flavor profile.
Meal Prep: These dishes actually improve with age. As the dish cools, the spices continue to infuse the meat. When reheating, use a low heat on the stovetop and add a tablespoon of water to loosen the gelatin; avoid the microwave, which can turn the beef rubbery through uneven molecular agitation.
The Wrap-Up
Mastering beef recipes india is about more than just following a list of ingredients; it is about understanding the physics of heat and the chemistry of spices. You have learned how to manipulate collagen, trigger the Maillard reaction, and balance a complex sauce with acidity. This is bold, soulful cooking that rewards patience and precision. Now, go serve this with some hot parathas or steamed rice and watch your friends realize that they have been missing out on the best-kept secret of Indian cuisine.
The Kitchen Table
Which cut of beef is best for Indian curries?
Chuck, shank, or brisket are ideal. These cuts contain high amounts of collagen, which breaks down during the long, slow simmering process, resulting in a tender texture and a rich, viscous sauce that lean cuts like sirloin cannot provide.
Can I make these recipes in a pressure cooker?
Yes, a pressure cooker or Instant Pot accelerates the collagen breakdown. Typically, 20 to 30 minutes under high pressure replaces two hours of stovetop simmering. Always allow for a natural pressure release to keep the meat fibers from toughening.
Why is my beef curry gray instead of dark brown?
This usually happens if the meat was steamed instead of seared. Ensure the beef is dry before hitting the pan and avoid overcrowding. The deep brown color comes from the Maillard reaction and properly caramelized onions.
How do I make the dish less spicy without losing flavor?
Remove the seeds and pith from fresh chilies, as that is where the capsaicin is concentrated. You can also increase the amount of coconut milk or finish the dish with a dollop of Greek yogurt to mellow the heat.
What is the best way to store leftovers?
Store in an airtight glass container in the refrigerator for up to four days. The flavors will deepen over time. For longer storage, freeze for up to three months, thawing in the fridge before reheating slowly on the stove.