
Imagine the sound of a heavy bottomed skillet meeting a flame; that sharp, rhythmic hiss as cold protein hits a scorching surface. We have all been there, staring at a plastic wrapped brick of protein and wondering how to elevate it beyond the mundane. Mastering cooking with ground beef recipes is not just about heat; it is about controlling the chemistry of fat and fire.
Ground beef is the ultimate culinary chameleon. It can be the soul of a piquant Bolognese or the structural integrity of a smash burger. However, the difference between a gray, steamed mess and a deeply mahogany, caramelized masterpiece lies in the details. We are moving past the basic "brown and drain" method to embrace professional techniques that transform humble mince into a gourmet foundation. Grab your favorite apron and a glass of wine; we are about to turn your kitchen into a high end bistro.
The Gathers:
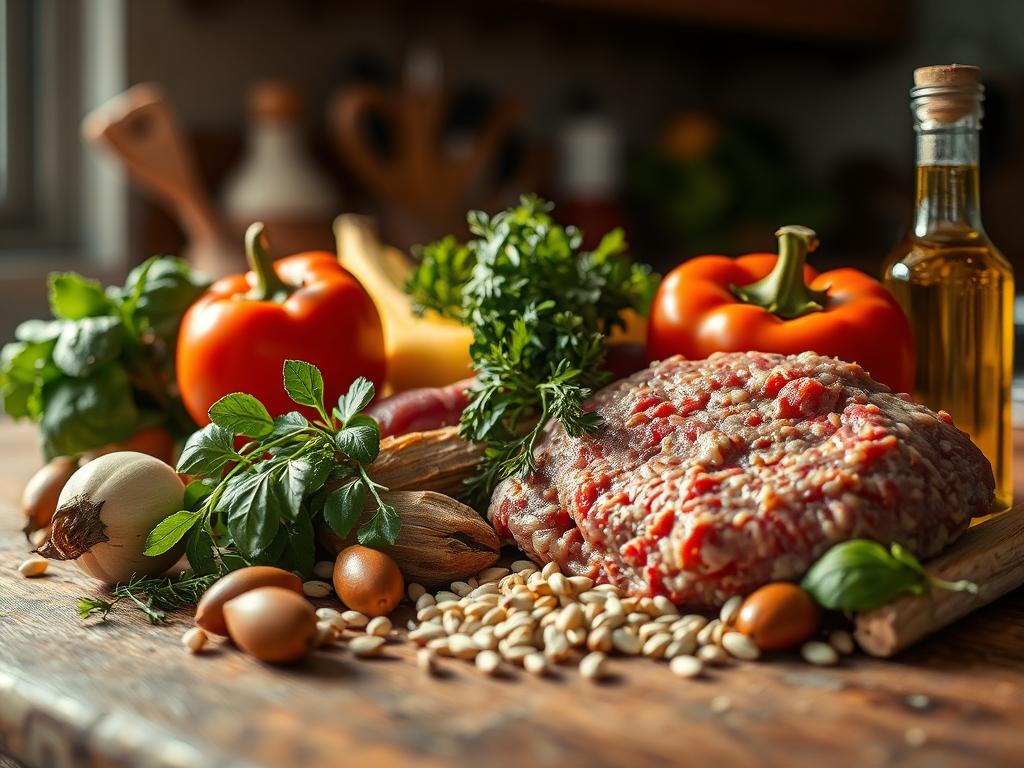
Before you even think about igniting the burner, your mise-en-place must be flawless. Professional chefs rely on a digital scale to ensure consistent portioning, especially when crafting patties or meatballs. You will need your beef, ideally a 80/20 blend. This ratio ensures enough intramuscular fat to render during the cooking process, providing both moisture and flavor.
Your secondary players include aromatics like shallots and garlic, finely minced with a sharp chef knife to ensure they melt into the fat rather than burning. For a flavor boost, keep a microplane handy for zesting citrus or grating fresh ginger to brighten the heavy notes of the beef.
Smart Substitutions:
If you are looking to lighten the profile without sacrificing the viscous mouthfeel of beef, try a "blended burger" approach. Replace thirty percent of the meat with finely chopped cremini mushrooms. They mimic the texture of beef while adding a hit of umami. For those avoiding nightshades, swap traditional tomato paste for an umami paste made of fermented black garlic and balsamic vinegar.
The Clock
The "Chef's Flow" is the secret to a stress free kitchen. It is the art of timing your movements so that every component reaches its peak at the exact same moment. For ground beef, the active prep time is usually fifteen minutes; this involves chopping aromatics and tempering the meat.
Never cook beef straight from the refrigerator. Allow it to sit on the counter for twenty minutes to take the chill off. This ensures a more even heat distribution. The actual cook time for browning is roughly eight to ten minutes. If you are simmering a sauce, you will need an additional forty five minutes to allow the flavors to infuse and the collagen to break down. Total time from fridge to table is approximately one hour for a complex dish, or twenty minutes for a quick sear.
The Masterclass
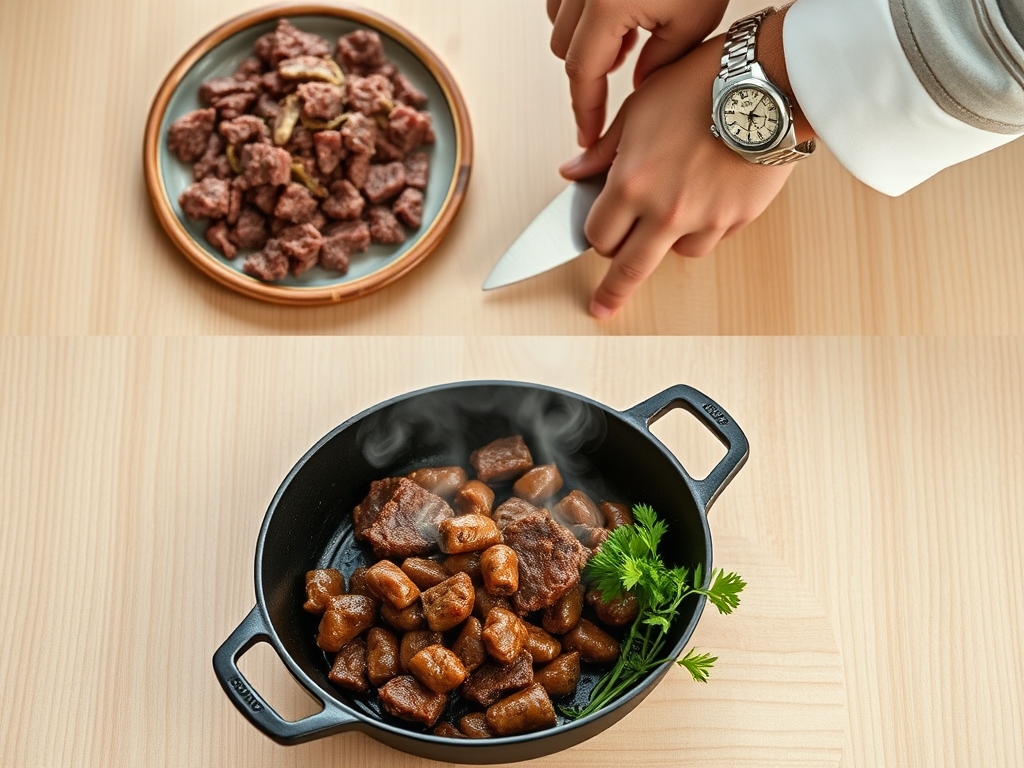
1. The Tempering Technique
Take your beef out of the packaging and pat it dry with paper towels. Moisture is the enemy of the Maillard reaction. If the surface is wet, the meat will steam in its own juices rather than developing a crust. Note the texture in the step-by-step photos above; the meat should look matte, not shiny.
Pro Tip: This is about thermodynamics. Water evaporates at 212 degrees Fahrenheit, while browning occurs above 300 degrees. By removing surface moisture, you allow the pan's energy to immediately trigger enzymatic browning instead of wasting energy on evaporation.
2. The Heavy Metal Choice
Use a cast iron or stainless steel heavy-bottomed skillet. These materials have high heat retention, meaning the temperature won't plummet when you add the meat. Heat the pan until a drop of water dances and disappears instantly. Add a high smoke point oil, like avocado or grapeseed oil, before the beef.
Pro Tip: Heat conductivity matters. A thin pan creates hot spots that lead to uneven cooking. A heavy pan ensures that every square inch of the beef experiences the same thermal load, preventing gray spots.
3. The Hands-Off Approach
Once the meat hits the pan, leave it alone. Do not use a spatula to frantically stir. Press the meat down slightly to ensure maximum surface contact and wait three minutes. You are looking for a deep, mahogany crust to form before you even think about breaking it up with a bench scraper or wooden spoon.
Pro Tip: Frequent stirring lowers the surface temperature of the meat. By leaving it undisturbed, you allow the proteins and sugars to undergo a complex chemical rearrangement, creating hundreds of new flavor compounds.
4. Deglazing the Fond
After the meat is browned and removed, you will see brown bits stuck to the bottom of the pan. This is called "fond." Do not wash it away. Add a splash of wine, stock, or even water, and use a whisk to scrape those bits up. This liquid is concentrated flavor gold.
Pro Tip: This is the process of deglazing. The liquid acts as a solvent, dissolving the caramelized proteins and incorporating them back into your sauce or gravy for a more complex profile.
5. Managing Thermal Carryover
Remove the beef from the heat when it is just shy of your target temperature. If you are making meatballs, pull them at 155 degrees Fahrenheit. The internal temperature will continue to rise during the resting period.
Pro Tip: This is thermal carryover. The exterior of the meat is hotter than the interior; once removed from the heat, that energy continues to move inward. Ignoring this leads to dry, overcooked results.
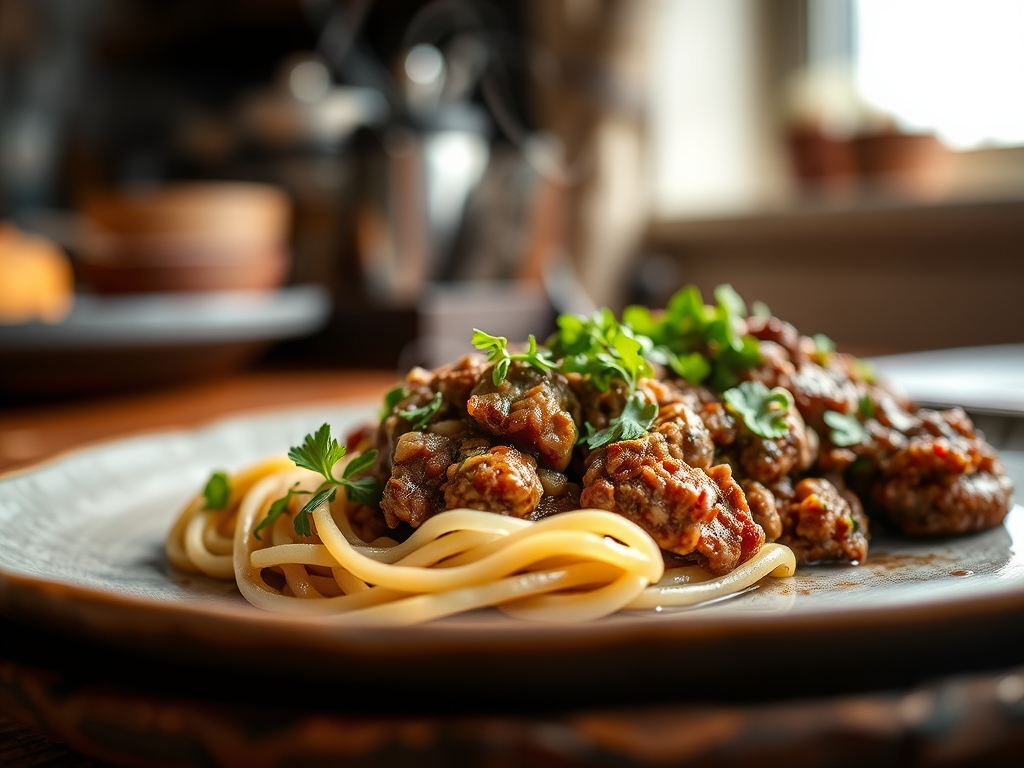
6. Emulsifying the Finish
If you are making a meat sauce, finish it with a pat of cold butter or a splash of heavy cream while whisking vigorously. This creates a silky, professional finish that clings to pasta perfectly.
Pro Tip: You are creating a stable emulsion. The fats in the butter bind with the water based sauce, creating a smooth texture that prevents the sauce from separating on the plate.
The Deep Dive
Ground beef is a nutritional powerhouse, offering high density protein, Vitamin B12, and Zinc. A standard four ounce serving of 80/20 beef contains roughly 20 grams of protein and 22 grams of fat. For those on a Keto diet, this ratio is nearly perfect. For Gluten-Free diners, ensure your binders in meatballs are replaced with almond flour or crushed pork rinds. Vegan swaps involve using pea protein crumbles, though you must add extra fat to mimic the beef's mouthfeel.
The Fix-It:
- The Meat is Gray: You overcrowded the pan. Fix it by removing half the meat and cranking the heat.
- Too Much Grease: Do not pour it down the drain. Use a spoon to remove excess, but leave a tablespoon for flavor.
- Tough Texture: You over-worked the meat. When forming patties, handle them as little as possible to keep the protein strands loose.
Meal Prep: To maintain "day-one" quality when reheating, avoid the microwave. Reheat ground beef in a saucier over low heat with a tablespoon of broth. This reintroduces moisture and prevents the fats from becoming waxy.
The Wrap-Up
Cooking with ground beef recipes is the ultimate test of a home cook's intuition. It is about listening to the sizzle, watching the color shift from pink to rust, and knowing when to let the pan do the work. By mastering the Maillard reaction and understanding the science of carryover heat, you elevate a simple weeknight staple into a culinary event. Now, go forth and sear with confidence!
The Kitchen Table
How do I stop ground beef from sticking?
Ensure your pan is properly preheated before adding oil. Use a heavy-bottomed skillet and wait for the meat to naturally release from the surface once a crust has formed.
Why is my ground beef watery?
This usually happens if the pan is too cold or too crowded. The meat steams instead of searing. Cook in smaller batches and pat the meat dry before starting.
Is it safe to eat slightly pink ground beef?
The USDA recommends an internal temperature of 160 degrees Fahrenheit for ground meats. Use a digital thermometer to ensure safety while maintaining juiciness.
What is the best fat ratio for burgers?
An 80/20 ratio is the gold standard. The twenty percent fat content provides the necessary lubrication and flavor to keep the meat tender during high heat searing.