
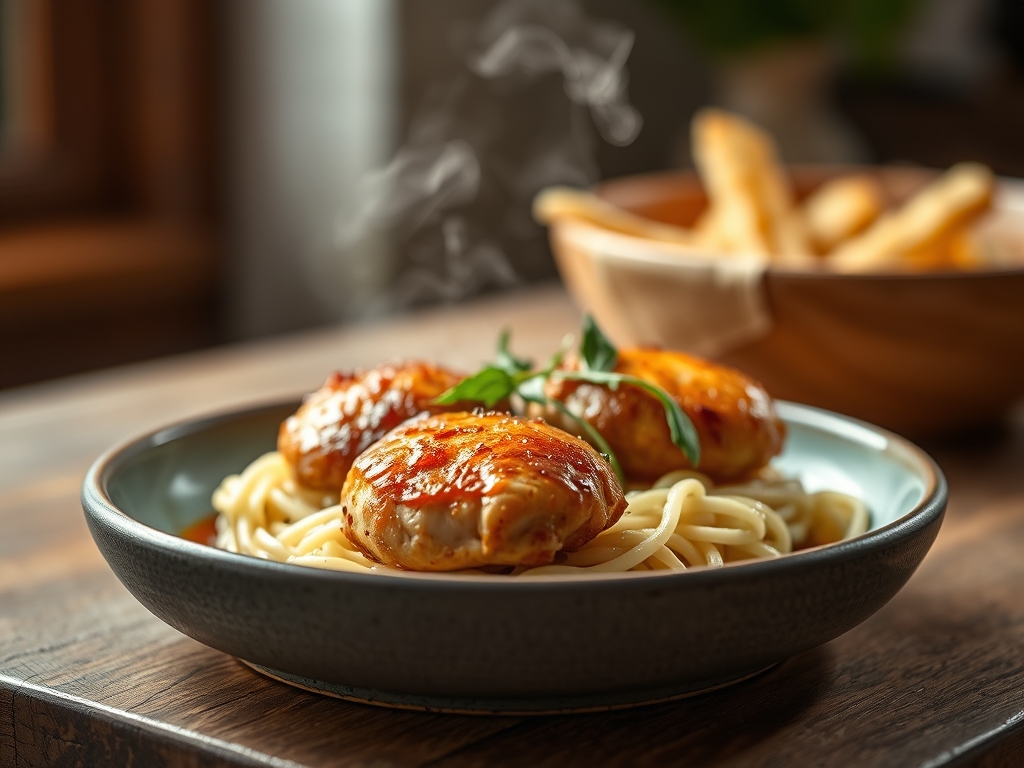
Picture the golden hour light hitting your kitchen counter as a heavy-bottomed skillet begins to hum with the sound of searing poultry. There is a specific, comforting magic found in the steam rising from a well-loved casserole dish. When you master campbell's chicken recipes, you are not just opening a can; you are deploying a sophisticated, pre-emulsified base designed for perfect sauce suspension and deep flavor infusion.
We have all been there. It is 6:00 PM, the fridge looks sparse, and the hunger is real. But tonight, we are elevating the humble pantry staple into a series of nine culinary masterpieces. By understanding the molecular behavior of starches and the way proteins interact with heat, we can transform these classics into restaurant-quality meals. We are going to dive into the chemistry of the Maillard reaction, the physics of sauce reduction, and the art of the perfect garnish. Grab your favorite apron and a glass of wine; we are about to turn your kitchen into a high-end bistro using the smartest shortcuts in the culinary world.
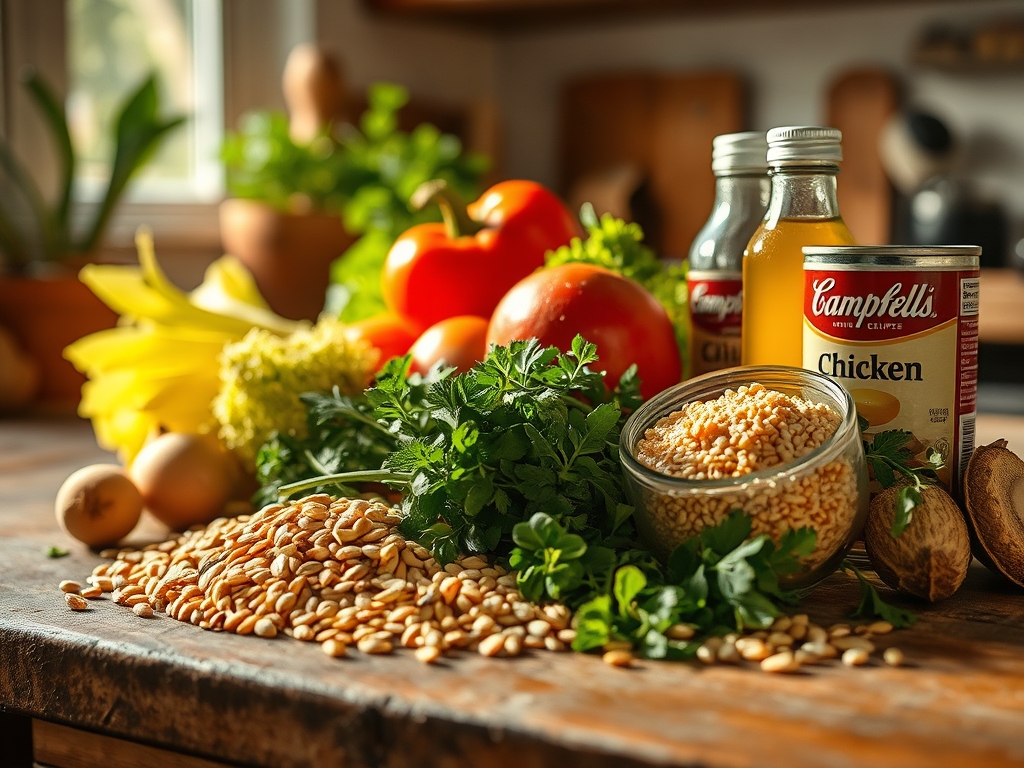
The Gathers:
Before we ignite the burners, we must respect the mise-en-place. Our primary protein is the chicken breast or thigh, which contains myofibrillar proteins that require precise temperature control to remain succulent. For our campbell's chicken recipes, the star of the show is the condensed soup; a viscous, homogenized blend of fats and thickeners that acts as a stable emulsion even under high heat.
You will need your aromatics: yellow onions for their high sugar content (perfect for caramelization), garlic cloves to be crushed with a flat knife to release allicin, and fresh herbs like thyme or rosemary for their volatile oils. Have your heavy-bottomed skillet and a silicone spatula ready. If you are feeling fancy, reach for a microplane to zest some lemon or grate fresh Parmesan.
Smart Substitutions: If you find yourself without Cream of Mushroom, a Cream of Celery or even a Golden Mushroom soup provides a similar protein-to-fat ratio. For a lower-sodium profile, utilize a splash of dry white wine to deglaze the pan; the acidity will brighten the dish and balance the savory notes. If you are aiming for a thicker texture without adding flour, a tablespoon of Greek yogurt added at the very end will provide a piquant tang and creamy mouthfeel.
The Clock: The Chef's Flow
Efficiency in the kitchen is about managing "The Flow." For these nine classics, the active preparation time is roughly 15 minutes, while the thermal processing (cooking) takes between 20 to 45 minutes depending on the specific recipe. The goal is to synchronize your tasks so that the starch component, whether it is jasmine rice or al dente pasta, finishes exactly when the chicken reaches its peak internal temperature.
Start by prepping your aromatics while the skillet preheats. This allows the pan to reach a state of high thermal mass, ensuring an immediate sear. While the chicken renders its fats, you can measure out your liquids and open your cans. By the time the oven timer dings, your kitchen should already be clean, leaving only the final plating and garnishing to be done.
The Masterclass:
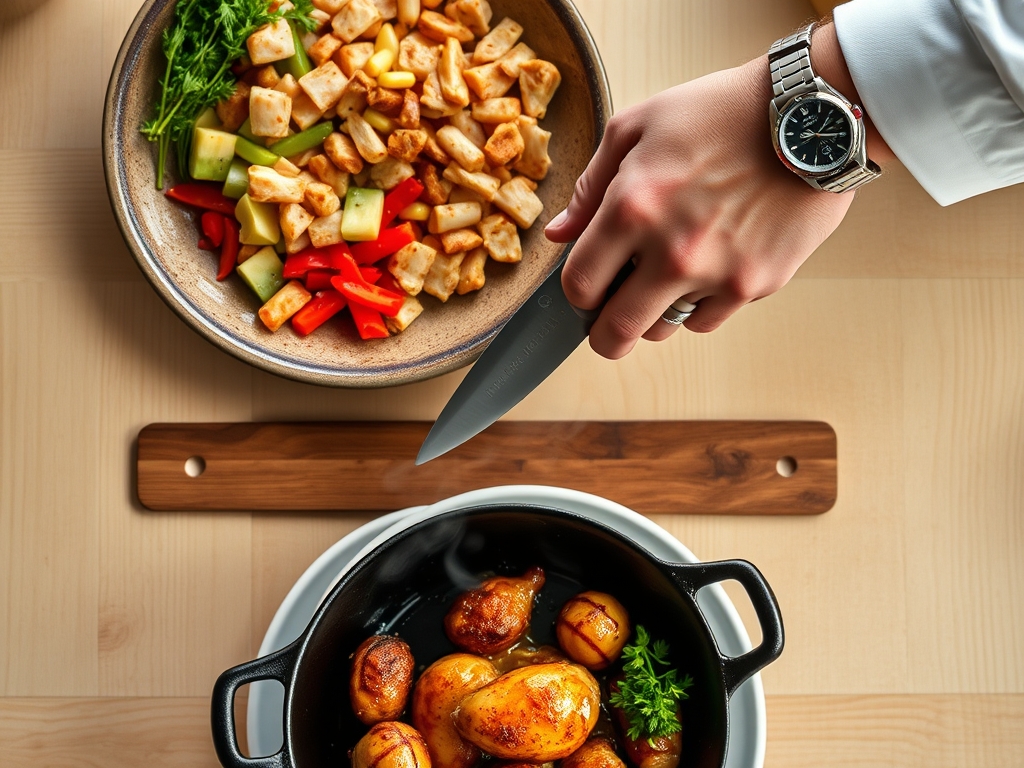
1. The Sear and Render
Begin by patting your chicken dry with paper towels. Moisture is the enemy of the Maillard reaction. Place the chicken in a hot skillet with a high-smoke-point oil. Do not crowd the pan, as this causes the temperature to drop and the meat to steam rather than sear.
Pro Tip: This step utilizes enzymatic browning. By removing surface moisture, you allow the amino acids and reducing sugars to react at 285 degrees Fahrenheit, creating a complex, savory crust that provides the foundation for the entire dish.
2. Deglazing the Fond
Once the chicken is browned and removed, you will see brown bits stuck to the bottom of the pan. This is called "fond." Pour in a small amount of stock or wine and use a wooden spoon to scrape these bits up.
Pro Tip: Deglazing is a chemical extraction process. Those browned bits are concentrated flavor molecules that, when dissolved back into a liquid, provide a depth of umami that a can of soup alone cannot achieve.
3. The Emulsion Integration
Lower the heat and whisk in your Campbell's soup base. Use a whisk or a saucier to ensure the condensed soup incorporates smoothly with the deglazing liquid. This creates a stable, silky sauce that will coat the back of a spoon.
Pro Tip: The starch in the soup acts as a stabilizer. By maintaining a simmer rather than a rolling boil, you prevent the fats from separating, ensuring the sauce remains perfectly homogenous and glossy.
4. The Aromatics Infusion
Add your sautéed onions, garlic, and herbs back into the sauce. This is the moment where you layer in the "high notes" of the flavor profile.
Pro Tip: Volatile oils in herbs are fat-soluble. By introducing them into the creamy soup base, you are "infusing" the fat molecules with flavor, which then carry those scents directly to your olfactory receptors as you eat.
5. The Low and Slow Simmer
Return the chicken to the pan, nestling it into the sauce. Cover and reduce the heat. This gentle poaching environment ensures the chicken stays tender while absorbing the flavors of the surrounding liquid.
Pro Tip: This stage relies on thermal carryover. By pulling the chicken off the heat just before it reaches 165 degrees Fahrenheit, the residual heat will finish the cooking process without toughening the muscle fibers.
The Deep Dive:
When we look at the macro nutrition of these campbell's chicken recipes, we see a solid balance of high-quality protein and complex carbohydrates. To lean into a Keto lifestyle, swap the traditional rice for riced cauliflower and ensure you are using the "Healthy Request" soup varieties to minimize added sugars. For my Gluten-Free friends, Campbell's offers excellent GF versions of their classic creams; always double-check the label for hidden thickeners.
The Fix-It: If your sauce is too thick, do not just add water; add a splash of chicken bone broth to maintain the flavor density. If the sauce breaks (separates), whisk in a teaspoon of heavy cream or a dollop of Dijon mustard to re-emulsify the fats. If the dish tastes "flat," it likely needs acidity; a squeeze of fresh lemon or a teaspoon of apple cider vinegar will wake up the flavors instantly.
For meal prep enthusiasts, the reheating science is vital. To maintain "day-one" quality, reheat your chicken and sauce in a skillet over low heat with a tablespoon of water. This creates a small steam chamber that re-hydrates the proteins without overcooking them in a microwave.
The Wrap-Up:
Mastering these campbell's chicken recipes is about more than just convenience; it is about using smart science to create soul-warming food. You have learned how to harness the Maillard reaction, manage emulsions, and balance flavors like a professional chef. Whether you are feeding a crowd or just treating yourself after a long day, these dishes prove that great cooking is accessible to everyone. Now, go forth and conquer that kitchen!
The Kitchen Table:
How do I prevent my chicken from getting rubbery?
Always use a digital thermometer to pull the chicken at 160 degrees Fahrenheit. The internal temperature will rise to 165 degrees through carryover cooking, ensuring the meat remains juicy and tender rather than overcooked and tough.
Can I make these recipes in a slow cooker?
Absolutely. Place the chicken and aromatics in the pot first, then pour the soup over the top. Cook on low for 4 to 6 hours to allow the connective tissues to break down without drying out the meat.
What is the best way to thicken a thin sauce?
Create a slurry using one tablespoon of cornstarch and one tablespoon of cold water. Whisk this into the simmering sauce and cook for two minutes. The heat will activate the starch granules, causing them to swell and thicken the liquid.
How long do leftovers stay fresh in the fridge?
When stored in an airtight container, these chicken dishes will maintain peak quality for 3 to 4 days. For the best texture, store the sauce and the starch (like rice or pasta) in separate containers to prevent sogginess.